Showing posts with label cards. Show all posts

Saturday, April 02, 2011

The Baby Cake Shower


We are so excited to meet Beckham Patrick Davis, the soon-to-arrive baby cake of Megan and Jason Davis (Megan is Mr. Awesome's cousin).

The Davis duo are awesome. Not only did they help with our wedding, which took place just months before their amazingly awesome wedding, they also let us come stay with them last year while they lived in NYC. Imagine being able to walk to the Met, central park, the subway ... to eating authentic slices of pizza, Argentinian steak, and the best cannolis in the world. So lovely and sweet of them to show us around their cool city.

Now they are back in LA (yay!), and we get to celebrate Megan and baby Beckham today! Megan appreciates the details, so I endeavored to make her a card that lets her know how excited we are for her and Jason and their very first baby! 

I got the idea to make the word "Shower" pop off the card from Sweet Sassy Diva. I found the word "Shower" on Gypsy Wanderings under the phrases key, and then welded it to the rattle from New Arrival. I welded that to a tag that included welded corners from Tags, Bags, Boxes and More. The trick is cutting out your word a second time, by itself, on a different colored paper--that way it really pops out and is readable.


I wrapped a bow around it, and I applied the whole thing to an A2 Base. I topped it off with a "bathtub and shower" from New Arrival. It has a layer if you'd like to add it, but I chose to use the shadow and apply Therm O Web Foam Squares to the whole thing to make it jump.

Inside I used the same bright yellow from the word "Shower" to decorate the inside. I found the umbrella in Paisley and welded it inside this nifty little shape from Tags, Bags, Boxes and More. Super cute!


I decided to tie the envelope together with the same ribbon from the card, so I used my Crop-o-Dile and went to town. There are two holes and eyelets on the flap and one hole below.

Adds an especially elegant baby shower vibe, don't you think?


I think it's super-fun to for the parents-to-be to see their baby's name on things ... so I welded together "Beckham Patrick" in the Gypsy Font. The trick to getting the perfect shadow is using your layers on the Gypsy.

Line it up on another layer to make sure it cuts out perfectly. Even if it's not totally perfect, who's to know? I added a little bling for the "i" in Patrick and we are all set.


Cartridges Used
Gypsy Font
Gypsy Wanderings
New Arrival
Paisley
Tags, Bags, Boxes and More

Cheers to the soon-to-arrive happy, healthy baby boy!
-marcia

Wednesday, March 30, 2011

Happy Birthday Dear Mitchie


My co-worker has had quite a year. After having some crappy things happen in her life, she took control and used the gym as her outlet. Over the past year she has had a total body transformation, and is now being featured in places like Shape and Health magazines!

Since I don't have any buff weightlifting girl Cricut cartridges ... I decided to make her a birthday card themed around wishes coming true, because she is out there reaching for the stars!


I cut out this cloud and stars from Paper Doll Dress Up cartridge so that it would fit perfectly on the front of this glittery A2 card base, then I found some stars and a moon on Paper Doll Dress Up as well--but in a totally unrelated location. The moon cut out super weird, so I ended up just using the stars to give a bit of a 3D effect thanks to my therm-o-web foam squares. I now see there are lots of moons and things on New Arrival, so that is a good option if you want a nice moon.

The cute paper is from a DCWV Stacks. I love the blue color with the maroon red; it isn't typical baby boy blue and lipstick red. They are really nice atypical colors.

I cut out the cake and the layer from Stretch Your Imagination. The cake is actually a baby pink even though it looks kind of peachy here. I had to "hide" the candles and the flame, as they cut with the cake. So you can see I cut the cake, the "frosting," the candles and the flames all separately. Hooray for Gypsy layers-by-force!

"Birthday Wish" was cut out from the Gypsy Font, while "Come True" was cut out from San Serif.

Since I had the outline of this adorable cloud and stars leftover, I realized it would go perfectly on the envelope! Clearly my best envelope ever, if I do say so.

Happy Birthday Mitchie!

-marcia


Monday, March 21, 2011

Baby, Baby

I have at least three friends who are pregnant right now, so I thought I'd better get a jump start on some baby card making!

Inspired by the popular teething toy, Sophie the Giraffe, which my sweet nephew loves, I made this cute giraffe card using New Arrival. I created an appropriately sized Giraffe, flipped it and welded it together.

This great cartridge also has a "layers" button, so cut that out to get the layered effect. This was a bit of a work in progress--a simple card that took longer than it should. I originally wanted a cute patterned paper for the top later, but it just looked weird / like a mistake, so I had to recut in standard giraffe colors--brown is the card and yellow is the top layer. Now I have a cute giraffe in cute paper with no home ... Hmm, wonder where he will end up.

I ran the giraffe through the Cuttlebug using Swiss Dots. I had to stick it through twice since the giraffe is taller than an A2 card ... convenienetly I left a little spot to tie a ribbon ... almost like I'd planned it ... yeah that's it.

The cute B is for Boy is from my stash / stolen from my sweet mom. Once I know who this card will be going to, I will cut out the baby's name for the envelope.

Cheers to my parents-to-be friends!
-marcia

Saturday, March 05, 2011

Rain, Rain Go Away!

My mom has been having a rough time lately, so I wanted to cheer her up with a card. And I wanted an excuse to experiment with the ol' Cuttlebug.

I used a pre-cut A2 Card from DCWV. These sets are great, and you can often find them on sale at JoAnns and Michael's. I chose a yellow one as that reminded me of rain boots.

Here I put lots of paper and ran it through my Cricut ... all DCWV paper.


I then used the Paisley Cricut cartridge to cut out this umbrella and the rain boots. Paisley is kind enough to have the shadows for both, so that makes things nice and easy. 


I ran the umbrella through the Cuttlebug using a flowery embossing folder, and then attached the top layer of the umbrella on with some pop dots so it would stick out / be awesome.


I glued the shadowed boots on the inside of the card to add a little somethin' somethin'. I used my handy Zig 2 Way Glue for all this gluing. When I spied this DCWV paper in one of my Stacks, it reminded me of some rain boots I saw at Target recently. ha!


You could also add a frame, some grass or a ribbon to this card to make it your own. I chose to add a butterfly embellishment I have from K. and Co. to the umbrella to help symbolize the rain clearing and brighter days ahead .... These cute butterflies were part of my Wal-Mart finds. Sometimes, Wal-Mart is worth braving (kind of).

I ran a second set of boots through the Swiss Dots embossing folder and stuck those to the envelope to cute that up a bit. Another bonus with using these DCWV pre-cut cards is they come with envelopes so no fumbling to make that fit just right. yay!

The finished product is below ... hopefully this help cheer my mom up a bit / chase the rain clouds away. :-)

cheers!
-marcia

Saturday, February 26, 2011

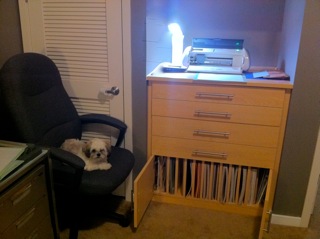
Molly and the Craft Station
Cupcake Birthday Card: Wild Card Cartridge
 
I had to put my new Cuttlebug to use today, and get ready for some upcoming birthdays. So I grabbed Molly the wonderpup, who just had her lady business removed a couple of weeks ago and needs lots of naps now, and we went to work on making the birthday cupcake card from the Wild Card cartridge. Who doesn't love cupcakes??

I really like this Wild Card cartridge. It makes cranking out shaped cards super-easy -- especially if you have the Gypsy! You can save your cards in there and just print them when you are ready. Ta-da!


I cut this card at 5 inches. You also cut all the liners and phrases you want at 5 inches as well -- it automatically makes everything fit together perfectly. This is especially nice if you don't have a Gypsy.

I have the Fiskars paper cutter, but I bought the replacement blade three-pack, which comes with an orange "scoring blade." It works great.
 
I used all DCWV for the card and Paper Source paper for the envelope. DCWV makes a great Glitter stack, which is what I used for the cupcake frosting and the candle -- they are both super sparkley though you can't really see it in the photo. If you have glimmer mist (which I don't ... sniffles.) you could use that instead.

I used pop-ups so the cupcake frosting would be 3D. I have these ghetto foam ones from Therm O Web (jigga what?), but they work great and I can't justify getting trendy gel flavored ones until I run out. I used my Scotch ATG Gun to put the envelope together--that seems to survive the mail. I used Zig adhesive to put the rest together.

I ran the cupcake "liner" through the Cuttlebug in the Swiss Dots folder, so in real life it's polka dots on polka dots. FUN! Loving my Cuttlebug already. :)

Have a fabulous weekend everyone!
Cheers!
-marcia